
Any filter combination you find yourself rebuilding — my active buyer-side files, closing this month — can be saved once and applied by name.
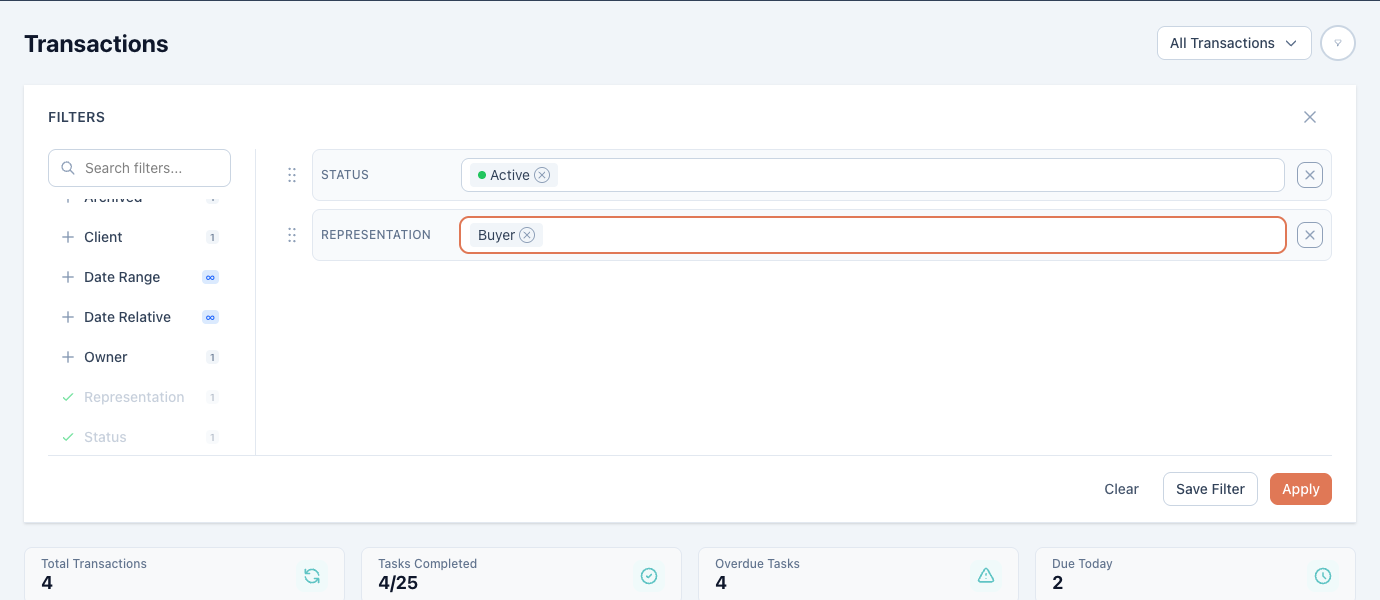
- On the Transactions or Listings page, open Filters.
- Pick your criteria from the list — owner, status, representation, date ranges, client, and more — they stack on the right.
- Click Save Filter, give it a name you’ll recognize (“My Pipeline”, “Closing This Week”), and save.
- Click Apply.
The saved filter now appears in the filter dropdown on the list pages and on the task reports.
Managing your filters
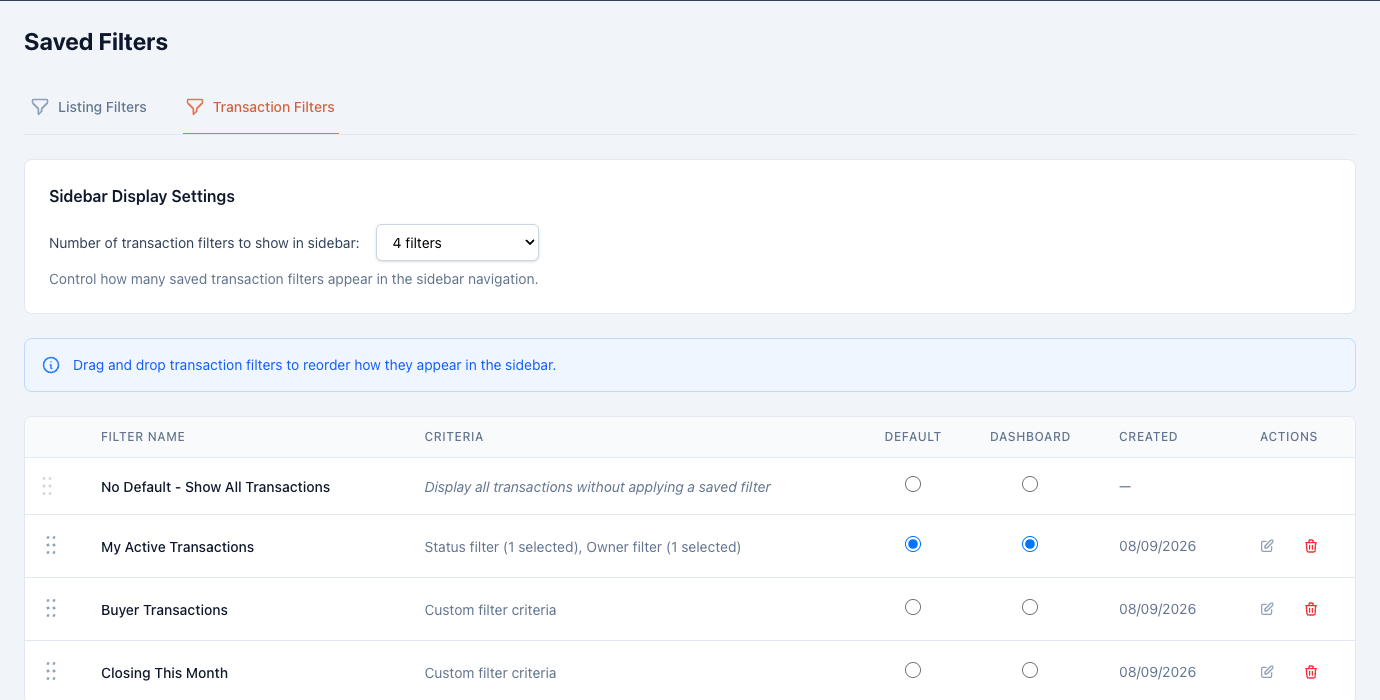
Settings → Filters lists your saved filters in two tabs (listing and transaction filters). From there you can:
- Rename or delete a filter.
- Drag to reorder how they appear in the dropdown.
- Mark one as Default — it’s applied automatically when you open the list pages and reports.
- Mark one as Dashboard — it scopes your dashboard cards.
Good to know
- Filters are personal — yours don’t appear for teammates, so everyone keeps their own views.
- Editing an applied saved filter gives you both Save (update it) and Save as New (branch a variation).
- You can keep up to 25 saved filters per view type — plenty, but a reason to prune the experiments occasionally.