
If you coordinate for agents or teams who want deliverables in their brand, you can override your account branding per client. Once set, every summary generated on that client’s transactions carries their look automatically.
- Open Contacts and edit the client.
- Find the Branding card.
- Check Use client branding instead of account branding on summaries.
- Set their Transaction Summary Color — use the color picker or paste a hex code.
- Upload their Client Logo (PNG, JPG, or SVG, up to 500KB — PNG prints most reliably).
- Save the contact.
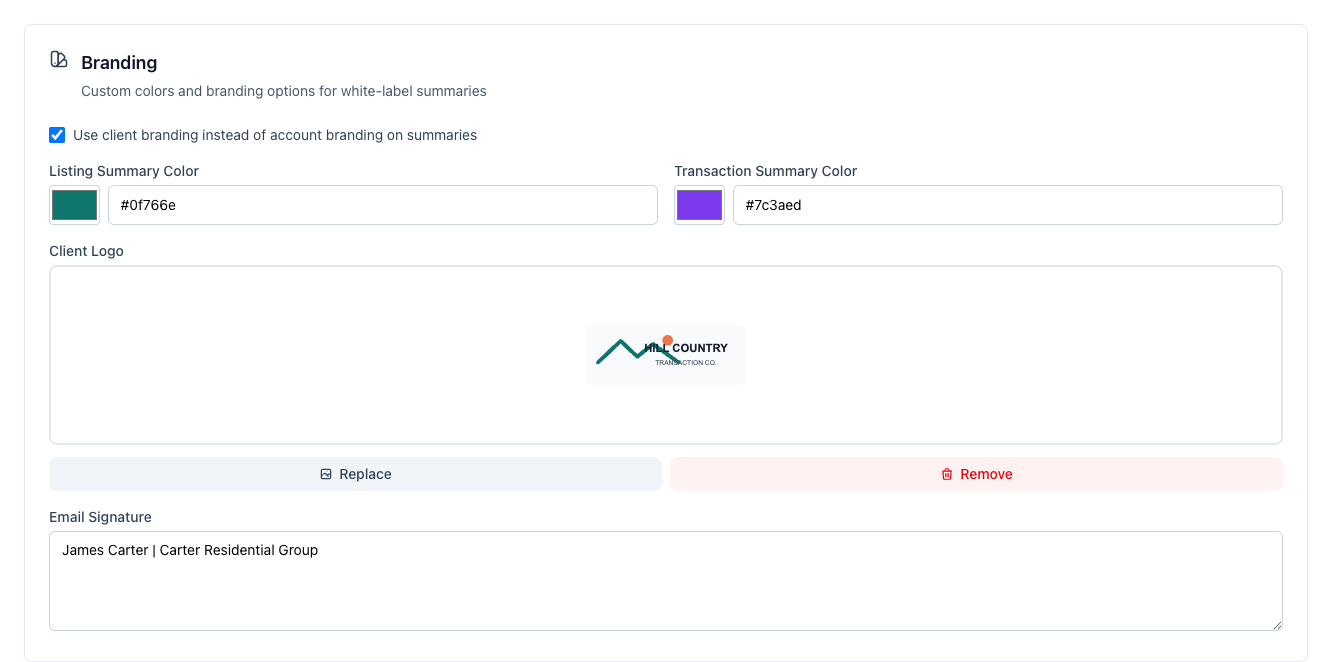
How the override works
On any transaction where that contact is attached in the Client role, their branding wins. Everyone else’s transactions keep your account branding.
The color and logo fall back independently: if you enable client branding and set a color but skip the logo, summaries use the client’s color with your account logo. Upload their logo if you want the full white-label effect.