
Two ways in — at creation, or any time after.
When creating the transaction
- On Create New Transaction, check the representation first — Buyer, Seller, or both, next to Transaction Details. The template list stays empty until you do: templates are matched to the side you’re representing.
- In Apply Checklist Templates, check the templates you want. Each shows its task count and buyer/seller badge.
- Save. Tasks are created and due dates calculate immediately from the dates you entered.
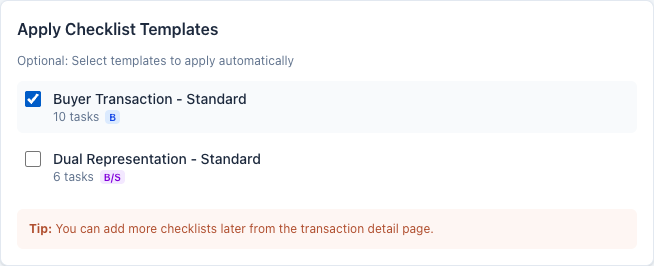
If you change representation while creating, incompatible templates uncheck themselves — re-pick before saving.
On an existing transaction
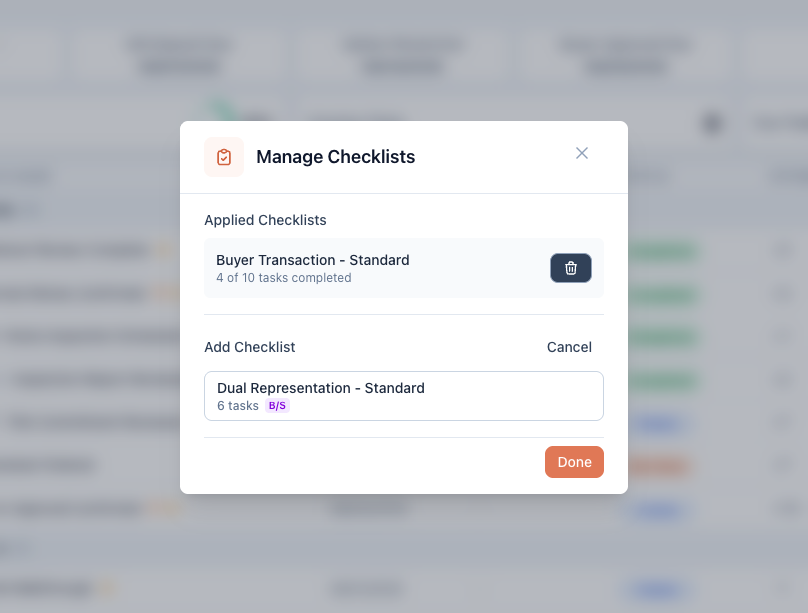
- Open the transaction and click Checklists in the toolbar.
- In Manage Checklists, the Add Checklist section lists templates not yet applied — click Add.
- Applied Checklists shows each checklist’s progress (“x of y tasks completed”). Removing one deletes its tasks from the transaction — the confirmation tells you how many.
How dates behave
Applying a template calculates every task’s due date from the transaction’s key dates using the rules built into the template. Dates missing on the transaction (no closing date yet, say) leave those tasks undated until you fill the date in — then they calculate. And whenever a key date is edited later, all task dates recalculate automatically.
Good to know
- Applied checklists are copies. Editing the template later doesn’t change transactions that already have it — and editing tasks on a transaction never touches the template.
- Only tasks matching the transaction’s side come along — a B/S-flagged template applies just the relevant half on a one-sided transaction.
- The same template can’t be applied twice to one transaction, and templates with no tasks don’t appear in the pickers.